Setup a CI/CD pipeline for React App with Jenkins and Gitlab

I am a software engineer. Documenting my DevOps journey
Introduction
This article helps you to automate the deployment of your React application using Jenkins and Gitlab pipeline on a remote web server.
Prerequisites
React application created and pushed in Gitlab repository.
Gitlab user credentials used to push and pull the code.
Running Jenkins instance on Ubuntu server with a valid domain or public IP (not localhost). Use this article to install Jenkins on an Ubuntu server using the Docker container.
Remote Ubuntu web server where we want to deploy an application. Nginx is already set up to serve this React application.
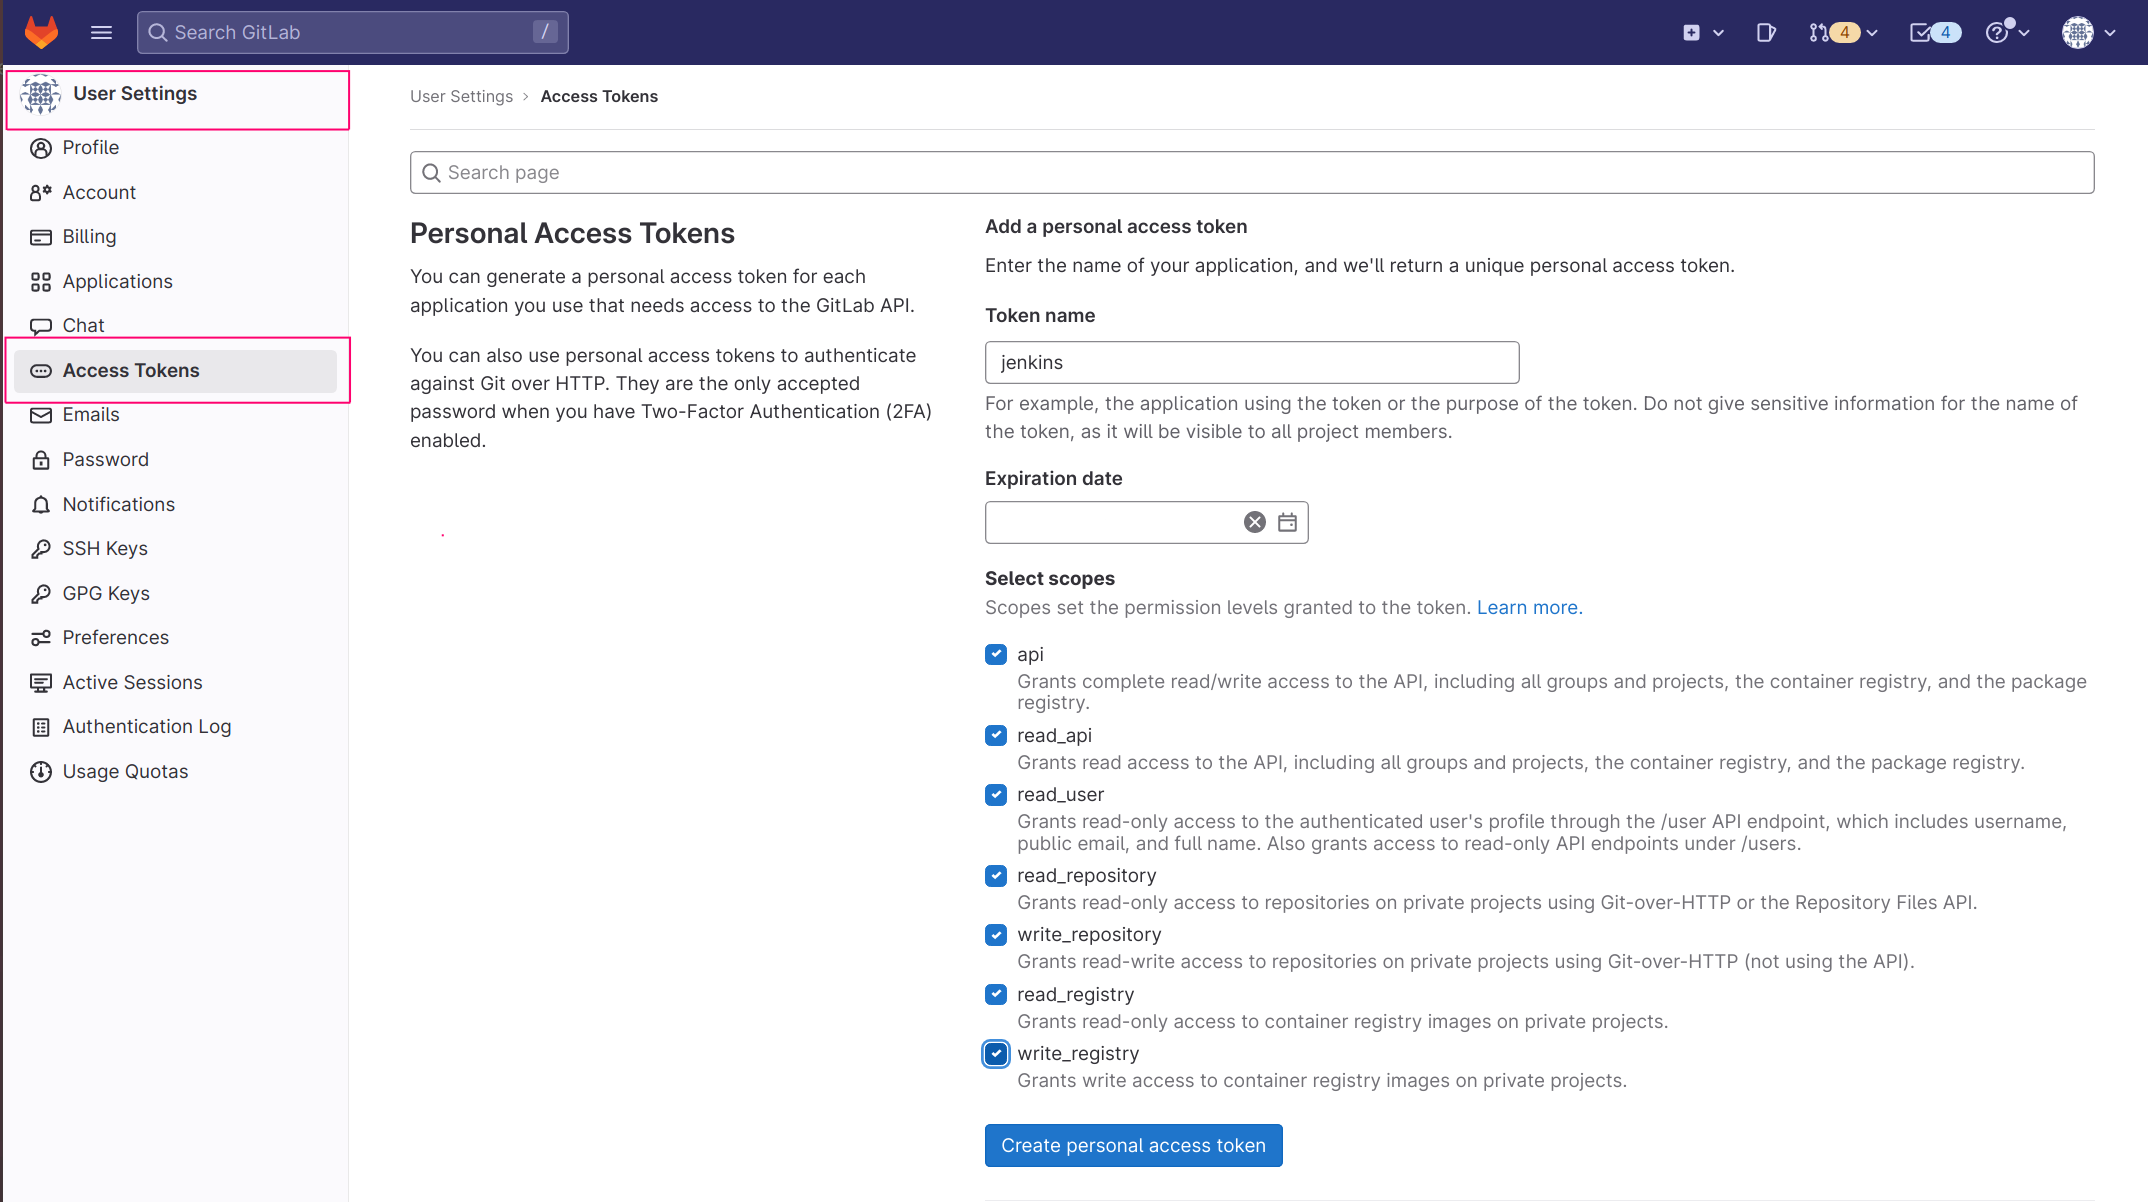
Generate Gitlab Access Token
To use GitLab with Jenkins, we’ll need to generate an access token in GitLab, which you can do in User Settings > Access tokens.
Give the token name Jenkins, select all scopes and click on Create personal access token button to create a token.
Add Gitlab Connection in Jenkins
In Jenkins, go to Manage Jenkins > Configure system and find the GitLab section.
To add a token that you previously generated, click on Add by the Credentials input and choose Jenkins. In the credentials dialogue, choose GitLab API token in the Kind input and paste your token from GitLab into the API token input field.
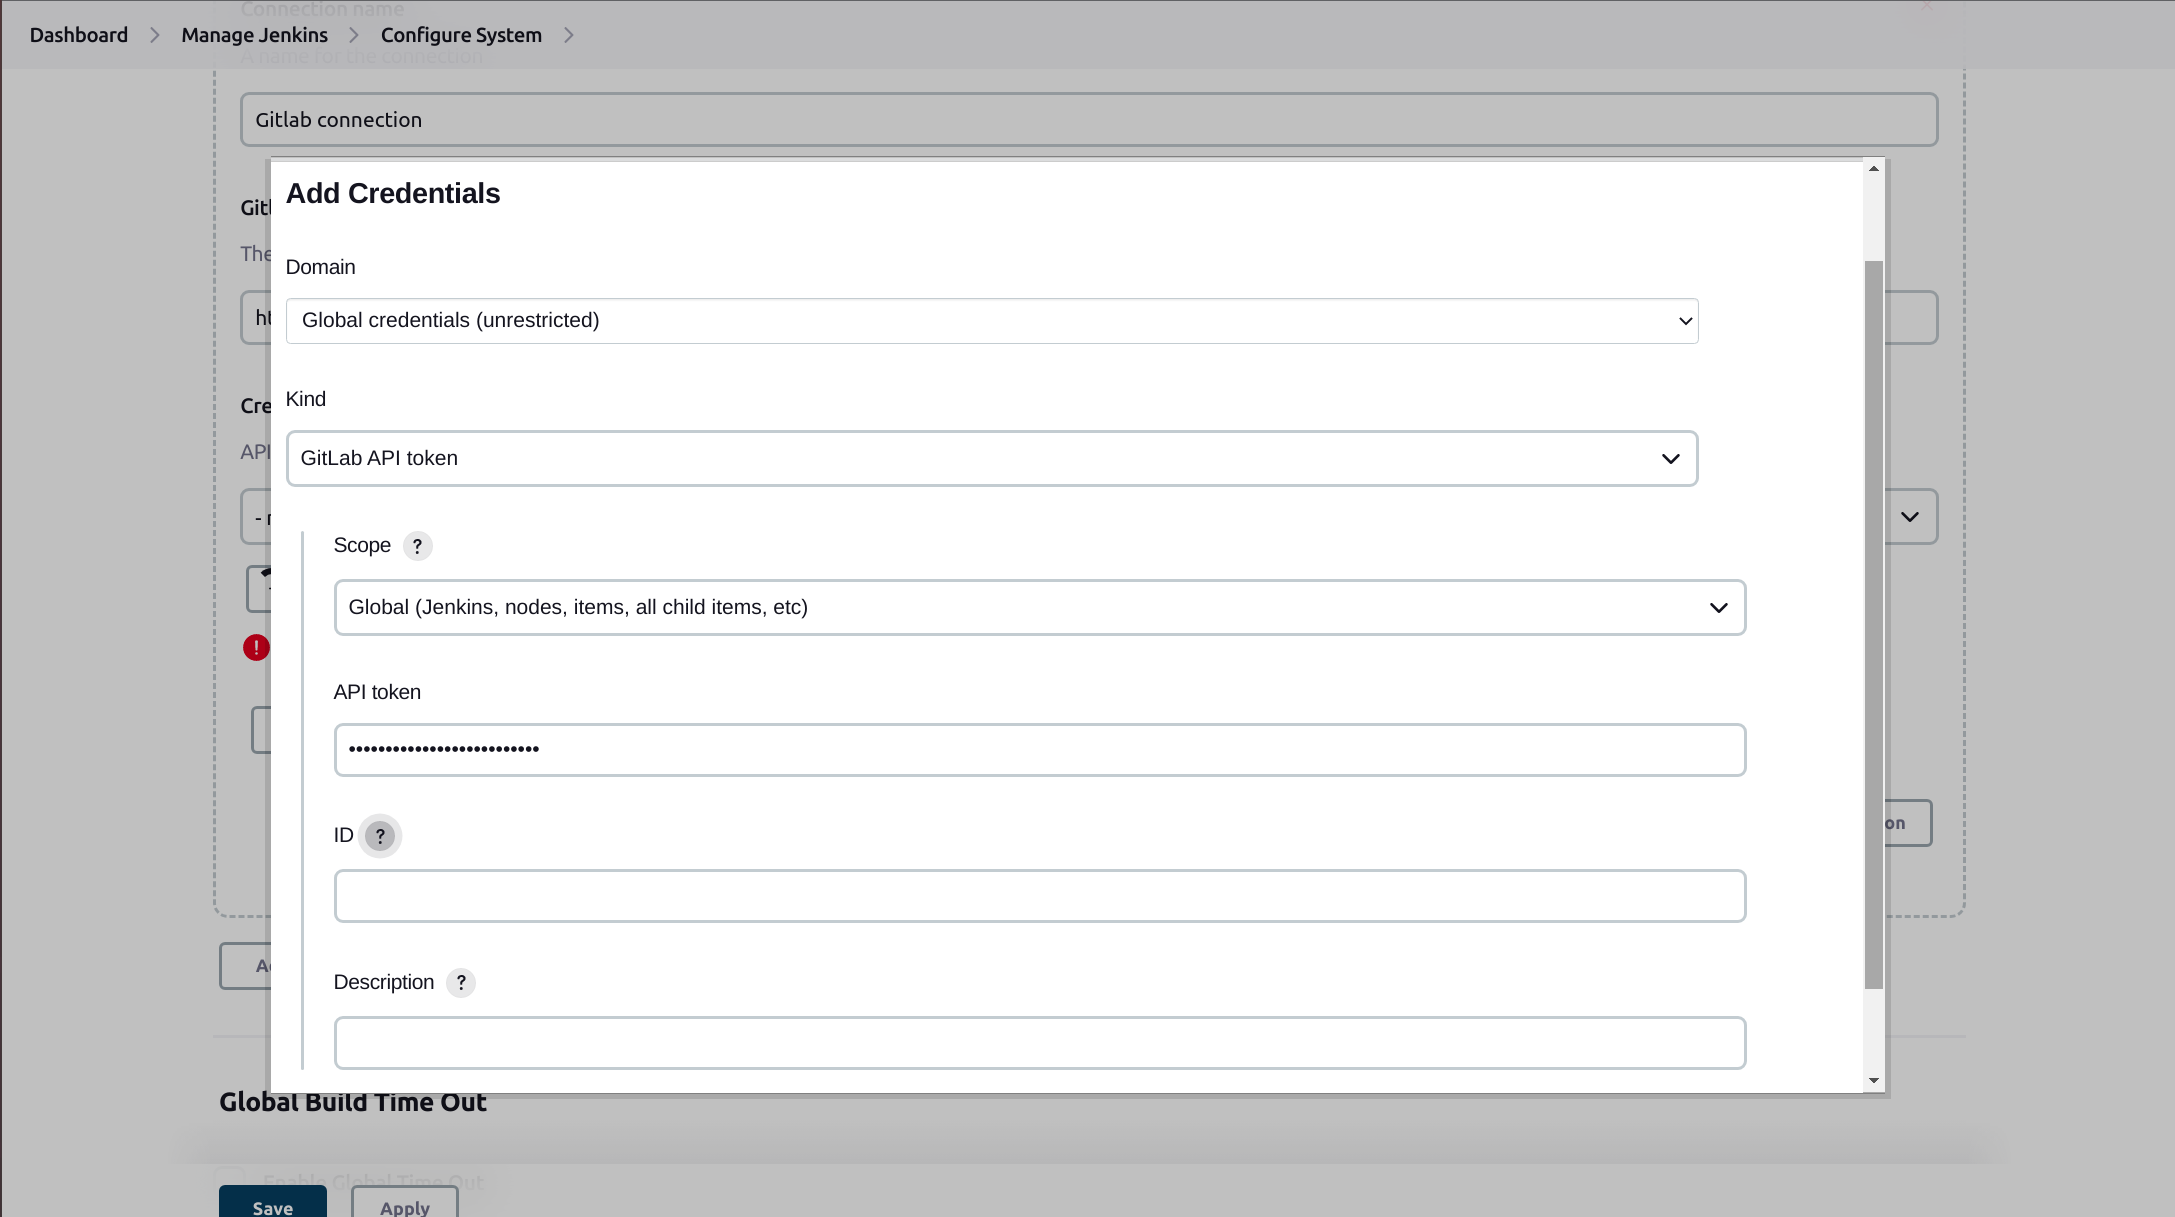
Give the connection name as Gitlab connection and type https://gitlab.com as the host URL in Gitlab host URL input field.

Test this new connection by clicking on the Test Connection button you will get a success message. Finally, click the save button.
Configure NodeJSInstaller
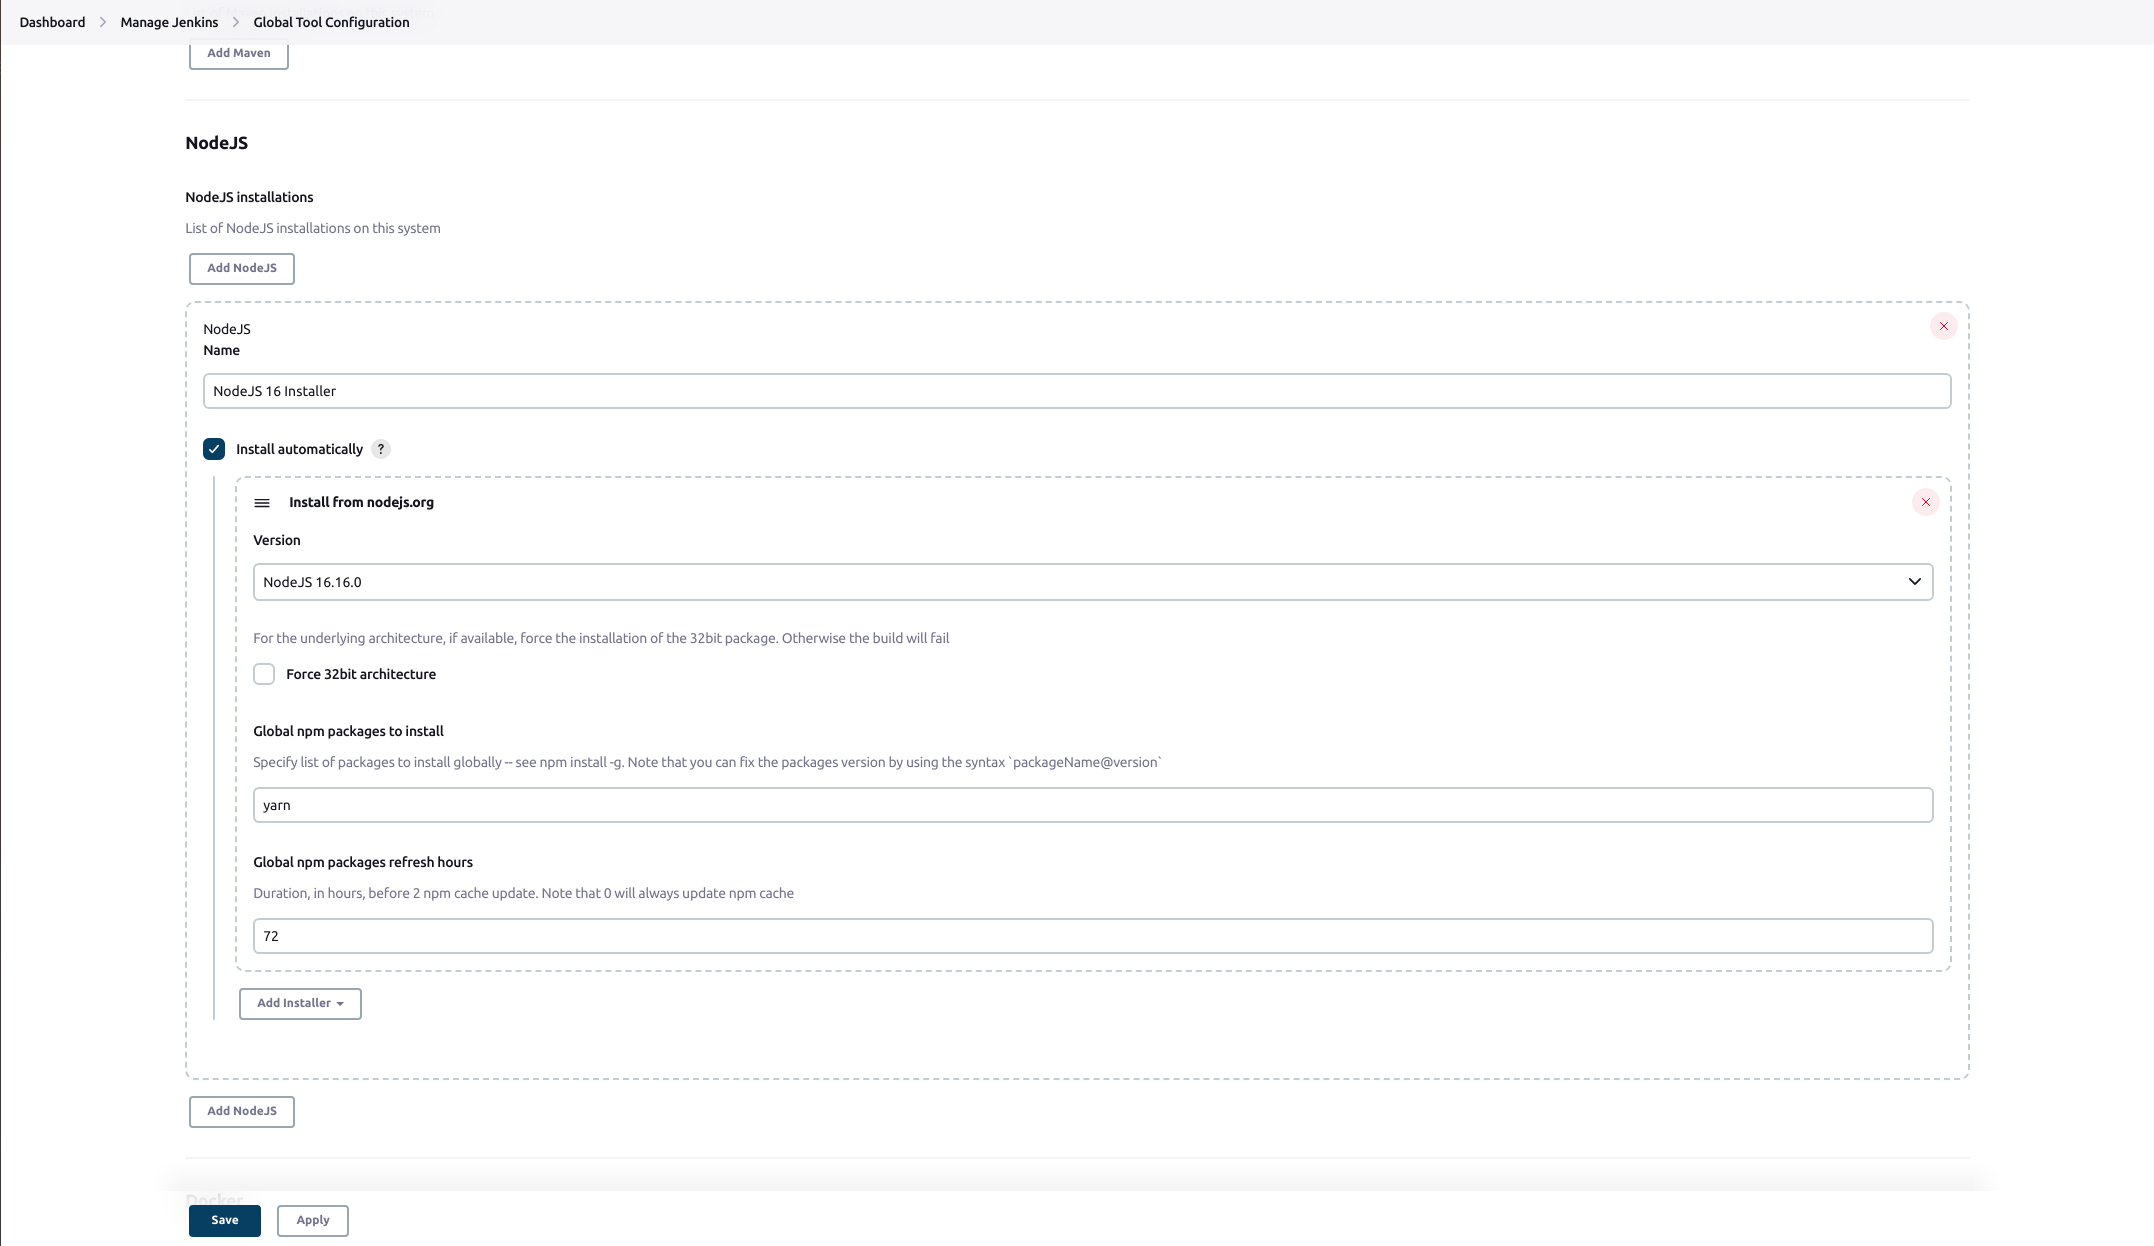
To run NPM scripts in the Jenkins instance, it is necessary to configure NodeJsInstaller.
Go to Manage Jenkins > Global Tool Configuration > NodeJS
Enter the name Node Js Installer in the Name input field and select the NodeJs version you wish to want to install. React app needs yarn npm package as a global dependency, so enter yarn in Global npm packages to install field. Click on the save button to finish the configuration.
Create CI pipeline
First, we will create CI pipeline to pull code from GitLab when the code is pushed to the GitLab repository and then create a build of the project.
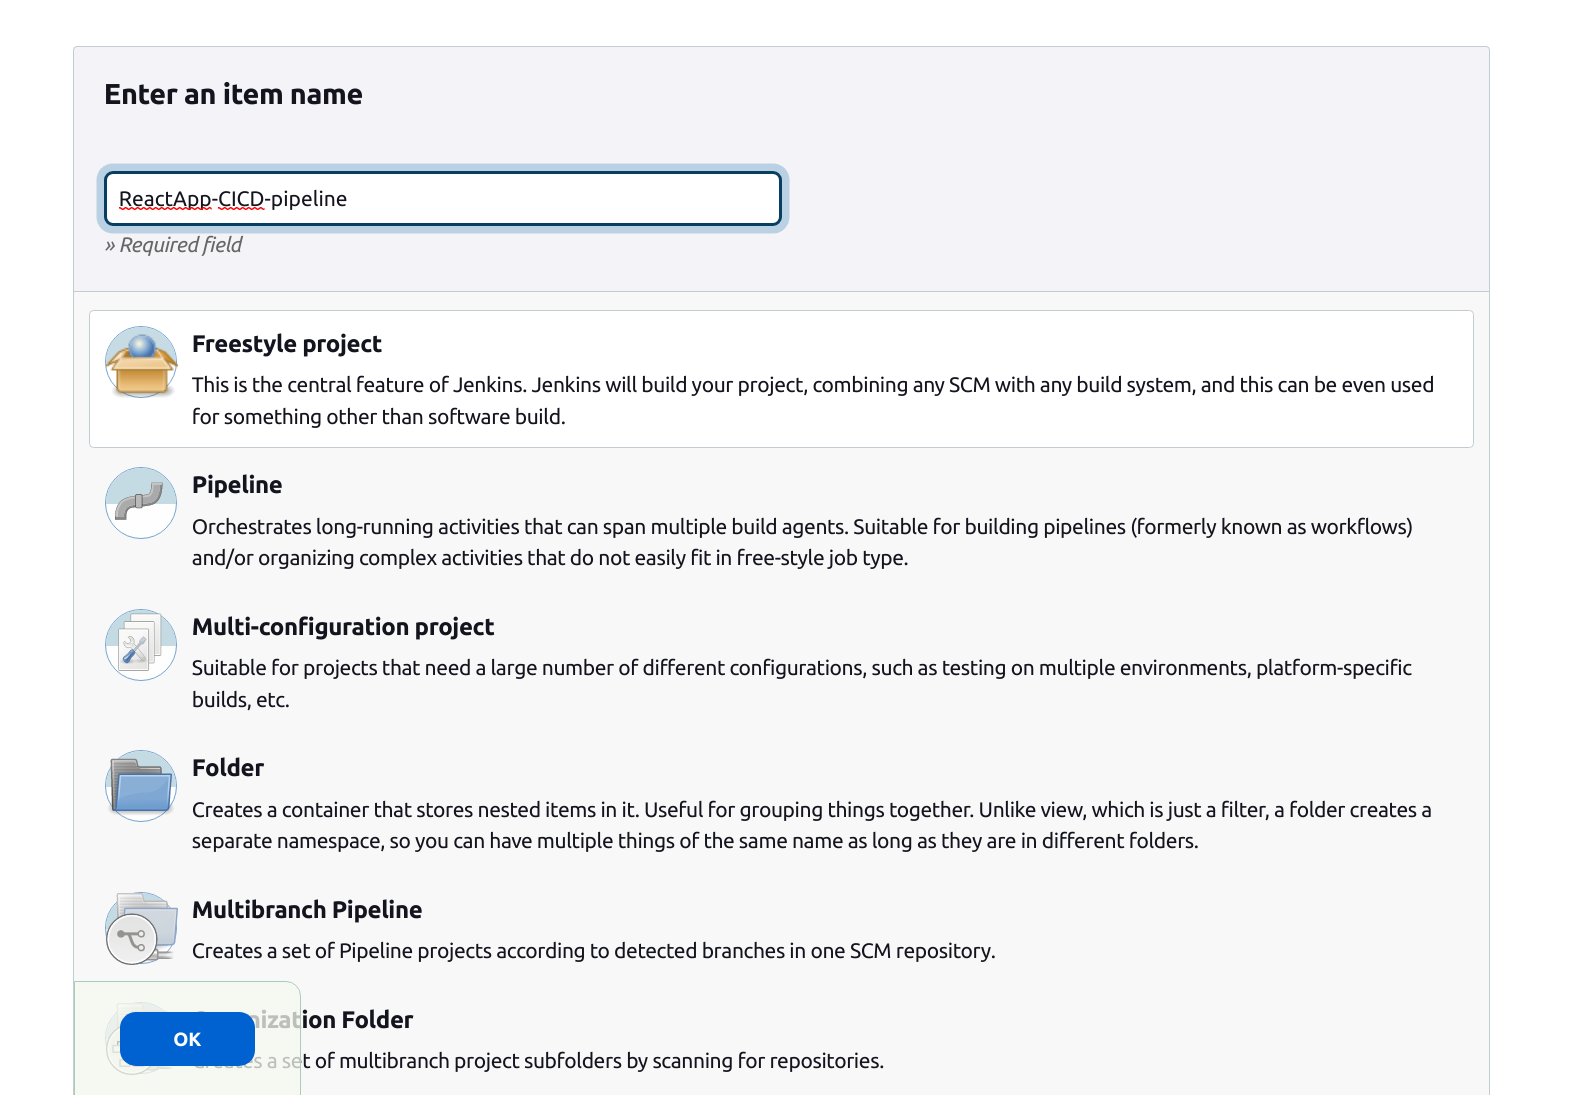
To create a pipeline in Jenkins click on New Item in the dashboard
Enter the name of the pipeline in the input box and select Freestyle project
Choose the GitLab connection that we have just created in the Gitlab Connection section

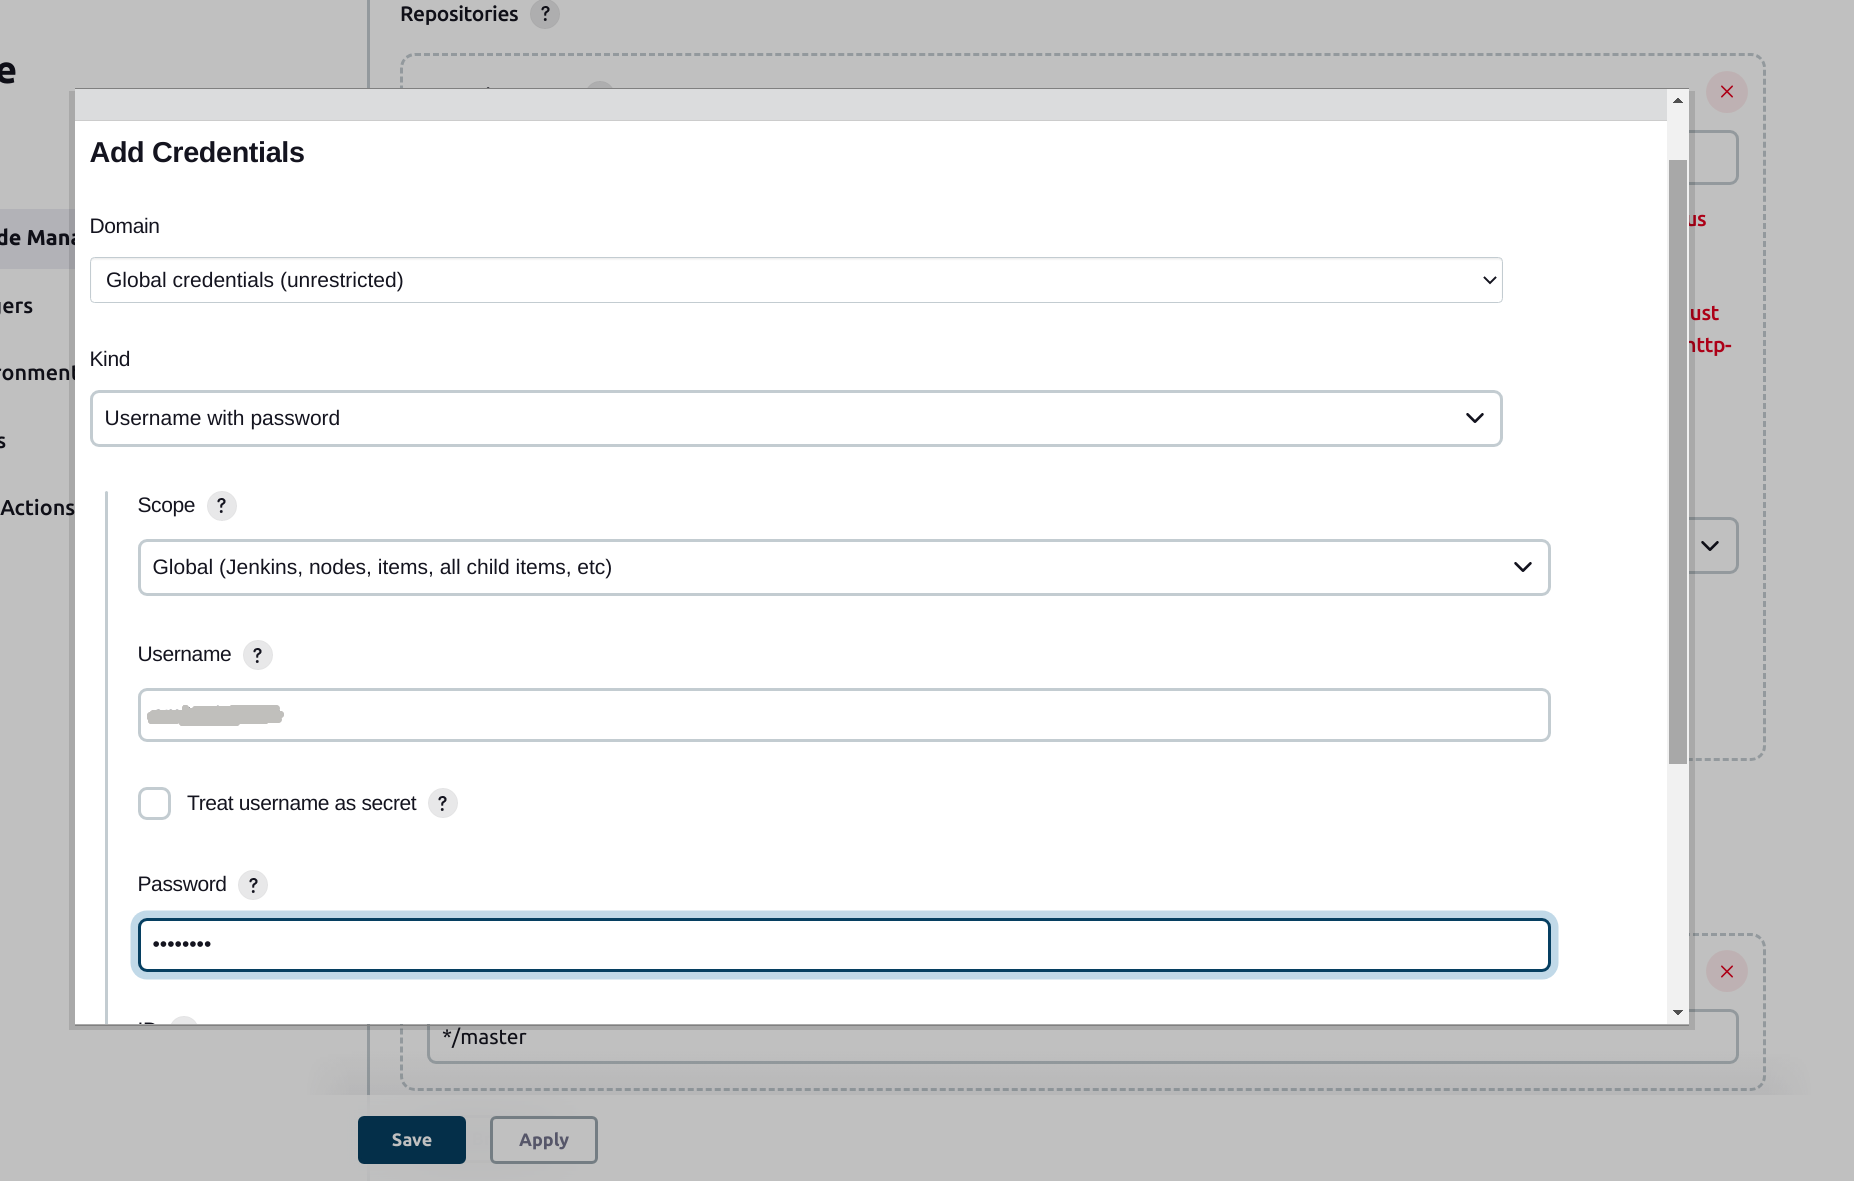
Choose Git as Source Code Management. Enter Gitlab repository URL. Add new credentials with Gitlab credentials username and password. These credentials will be used to clone the project in the Jenkins instance.
Enter the Gitlab branch name from where the code will be pulled from the repository.
See the below screenshot for the final configuration for the Source Code Management section. Here I have given newChanges a branch name.

Next, we have to configure Build Triggers. Here we will select which GitLab event the project build should get triggered.
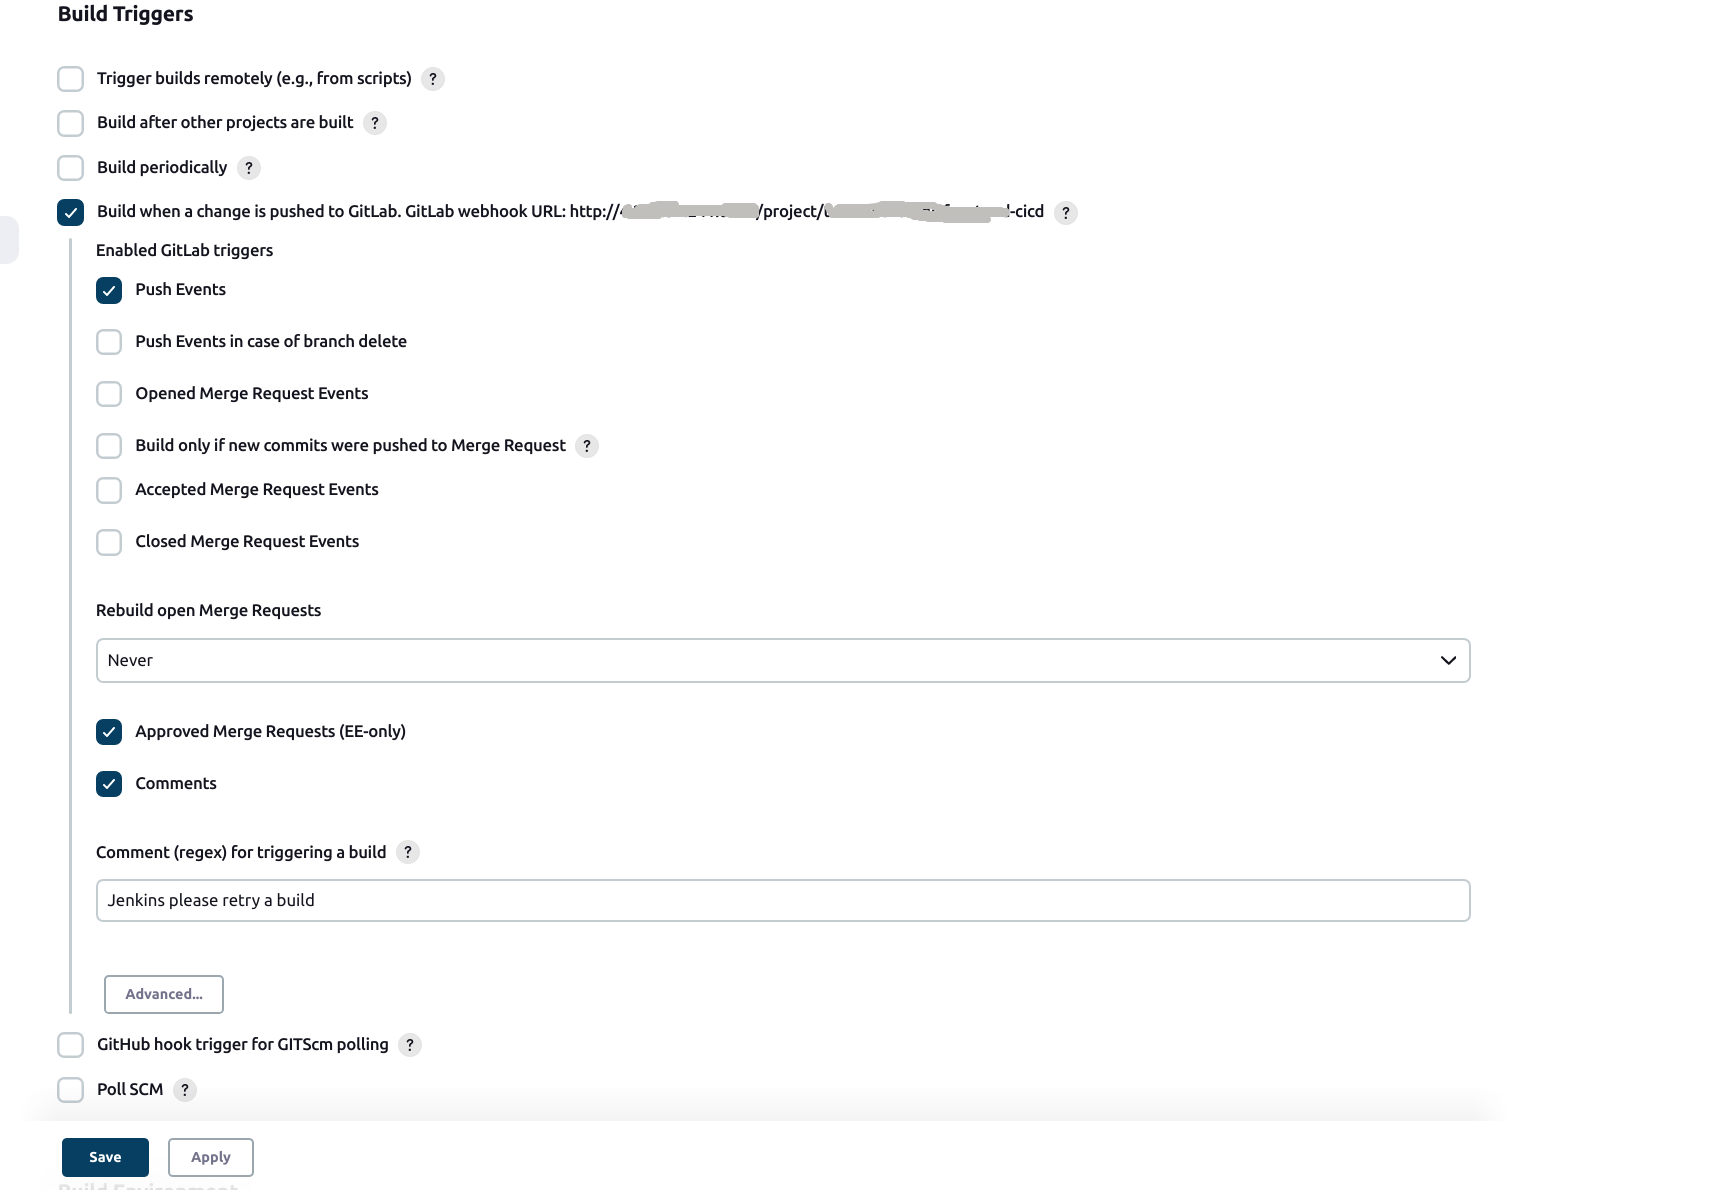
Here we have selected Push Events. That means when the code is pushed to the repository, the build should be triggered.
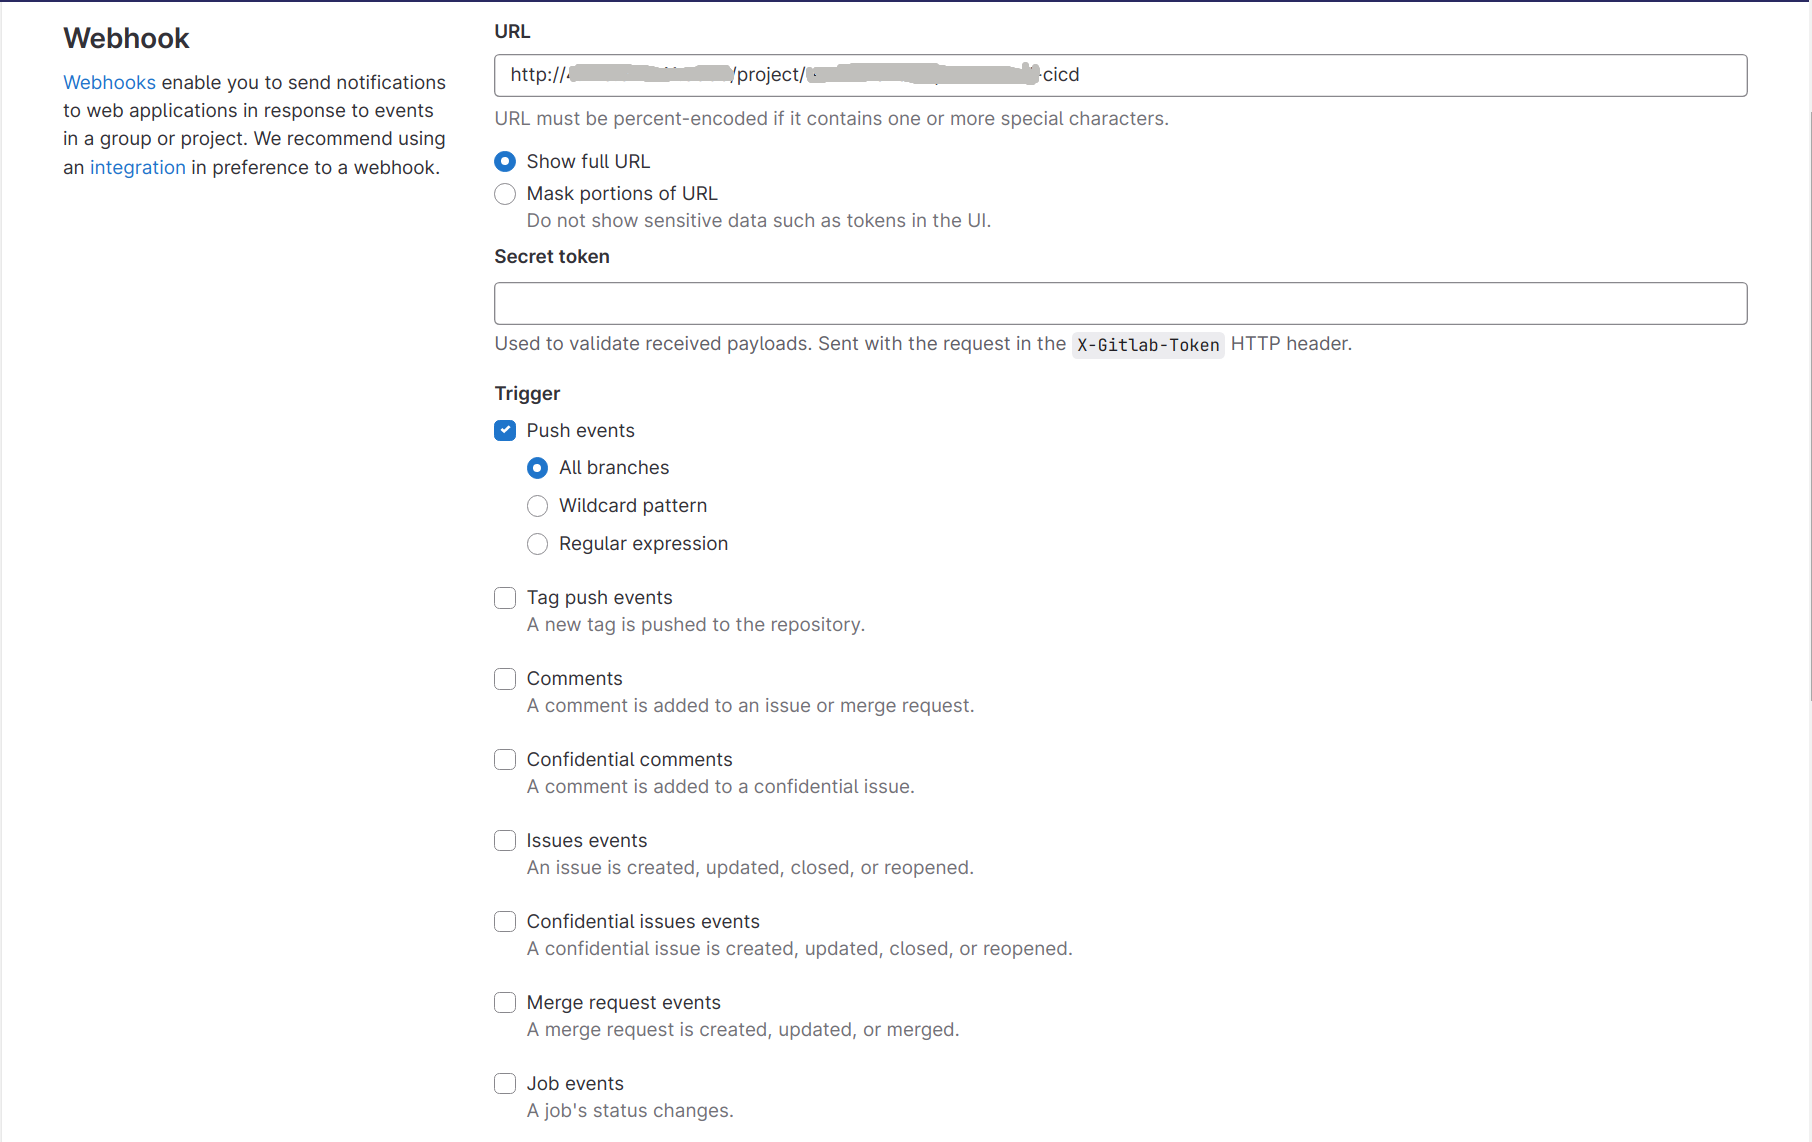
Now we have to add a webhook in GitLab that will trigger this build. Go back to Gitlab to add webhook. Go to Settings --> Webhooks. Copy the URL provided by Jenkins and paste it into URL input field of the form. Disable SSL verification if Jenkins is not on SSL and finally click on Add Webhook button
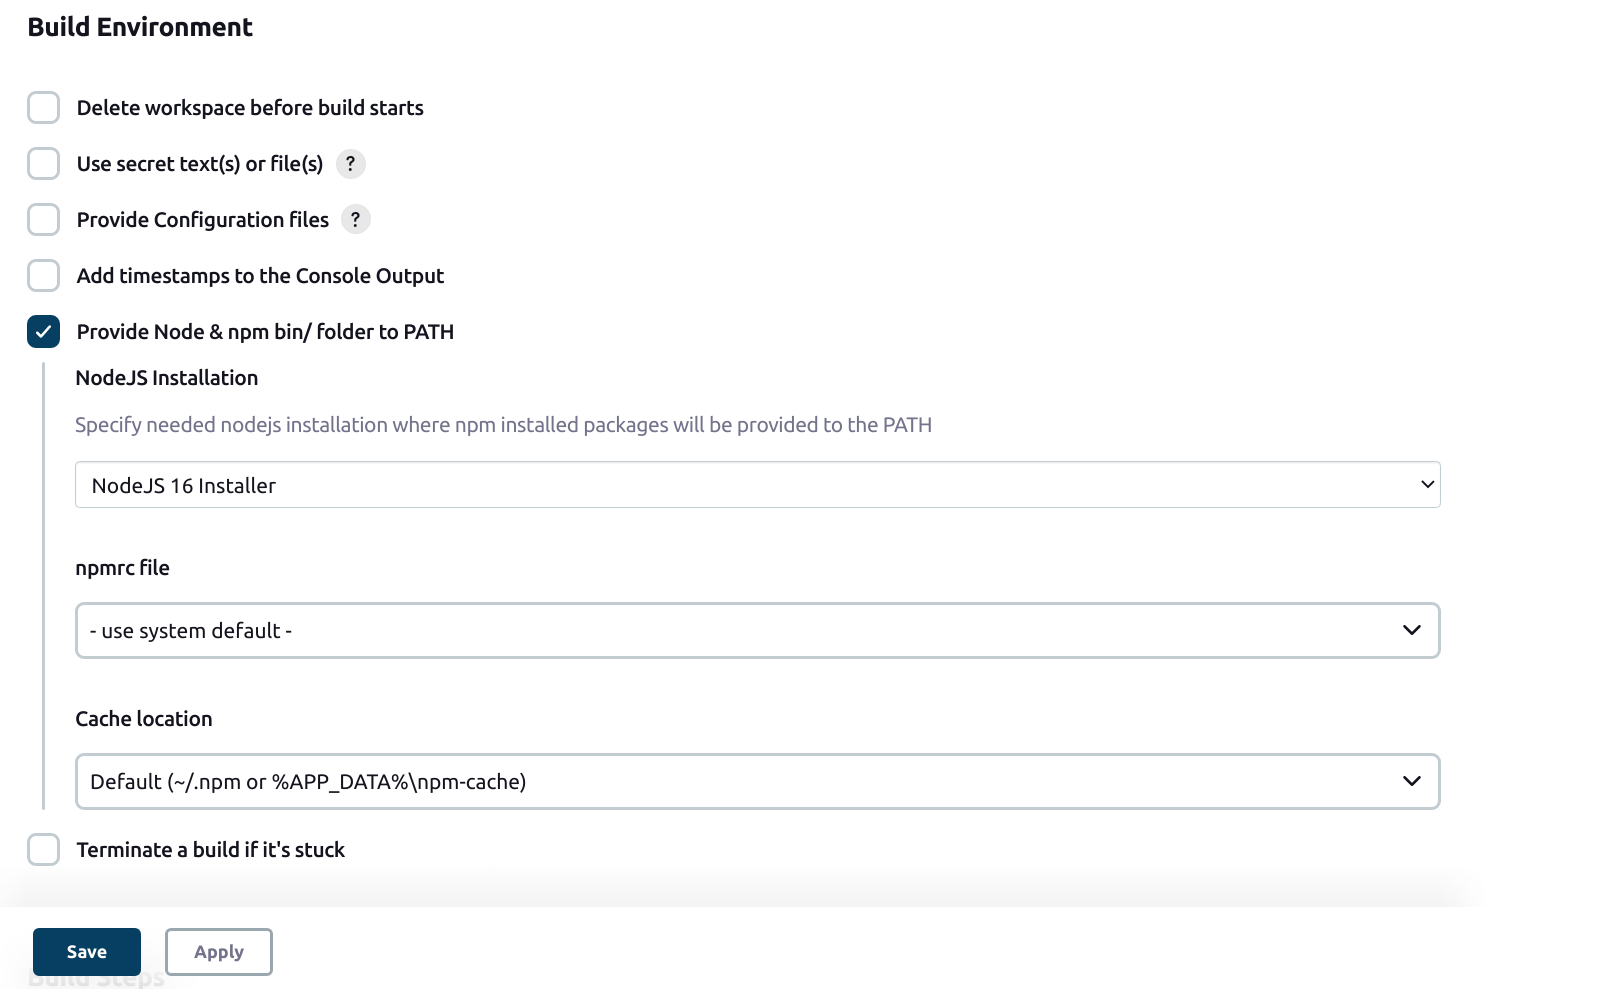
Next is the Build Environment configuration. Provide the configured NodeJsInstaller in the global configuration to be able to run npm commands.
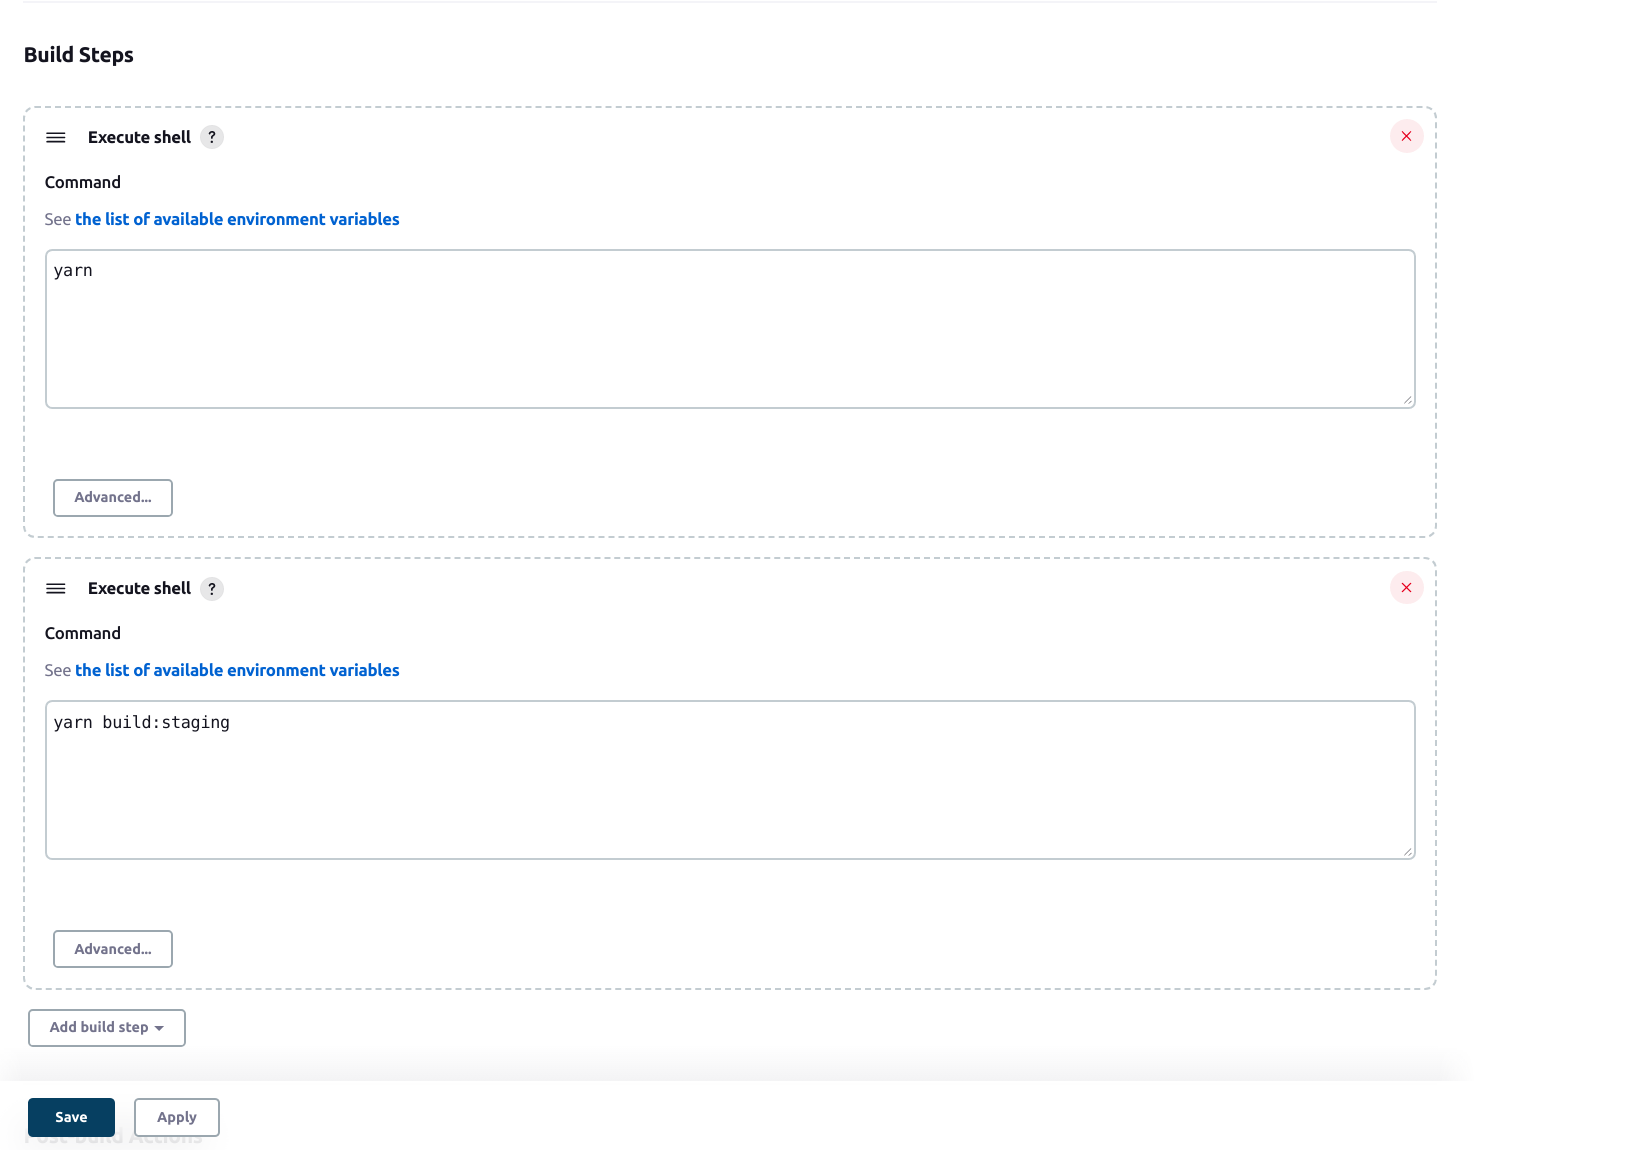
Next in the Build Steps section select Execute shell in Add build step. Add commands one by one to install react packages and to build app using Yarn. Here we have used environments to build stage to environment
Now our build is ready till this step. The next step is to deploy this build on a remote server. For this, we will use Publish Over SSH plugin. For an installation for this plugin navigate to Dashboard > Manage Jenkins > Manage Plugin section. Locate this plugin by searching for publish-over-ssh. Check the checkbox and click on the button Download now and install after restart.
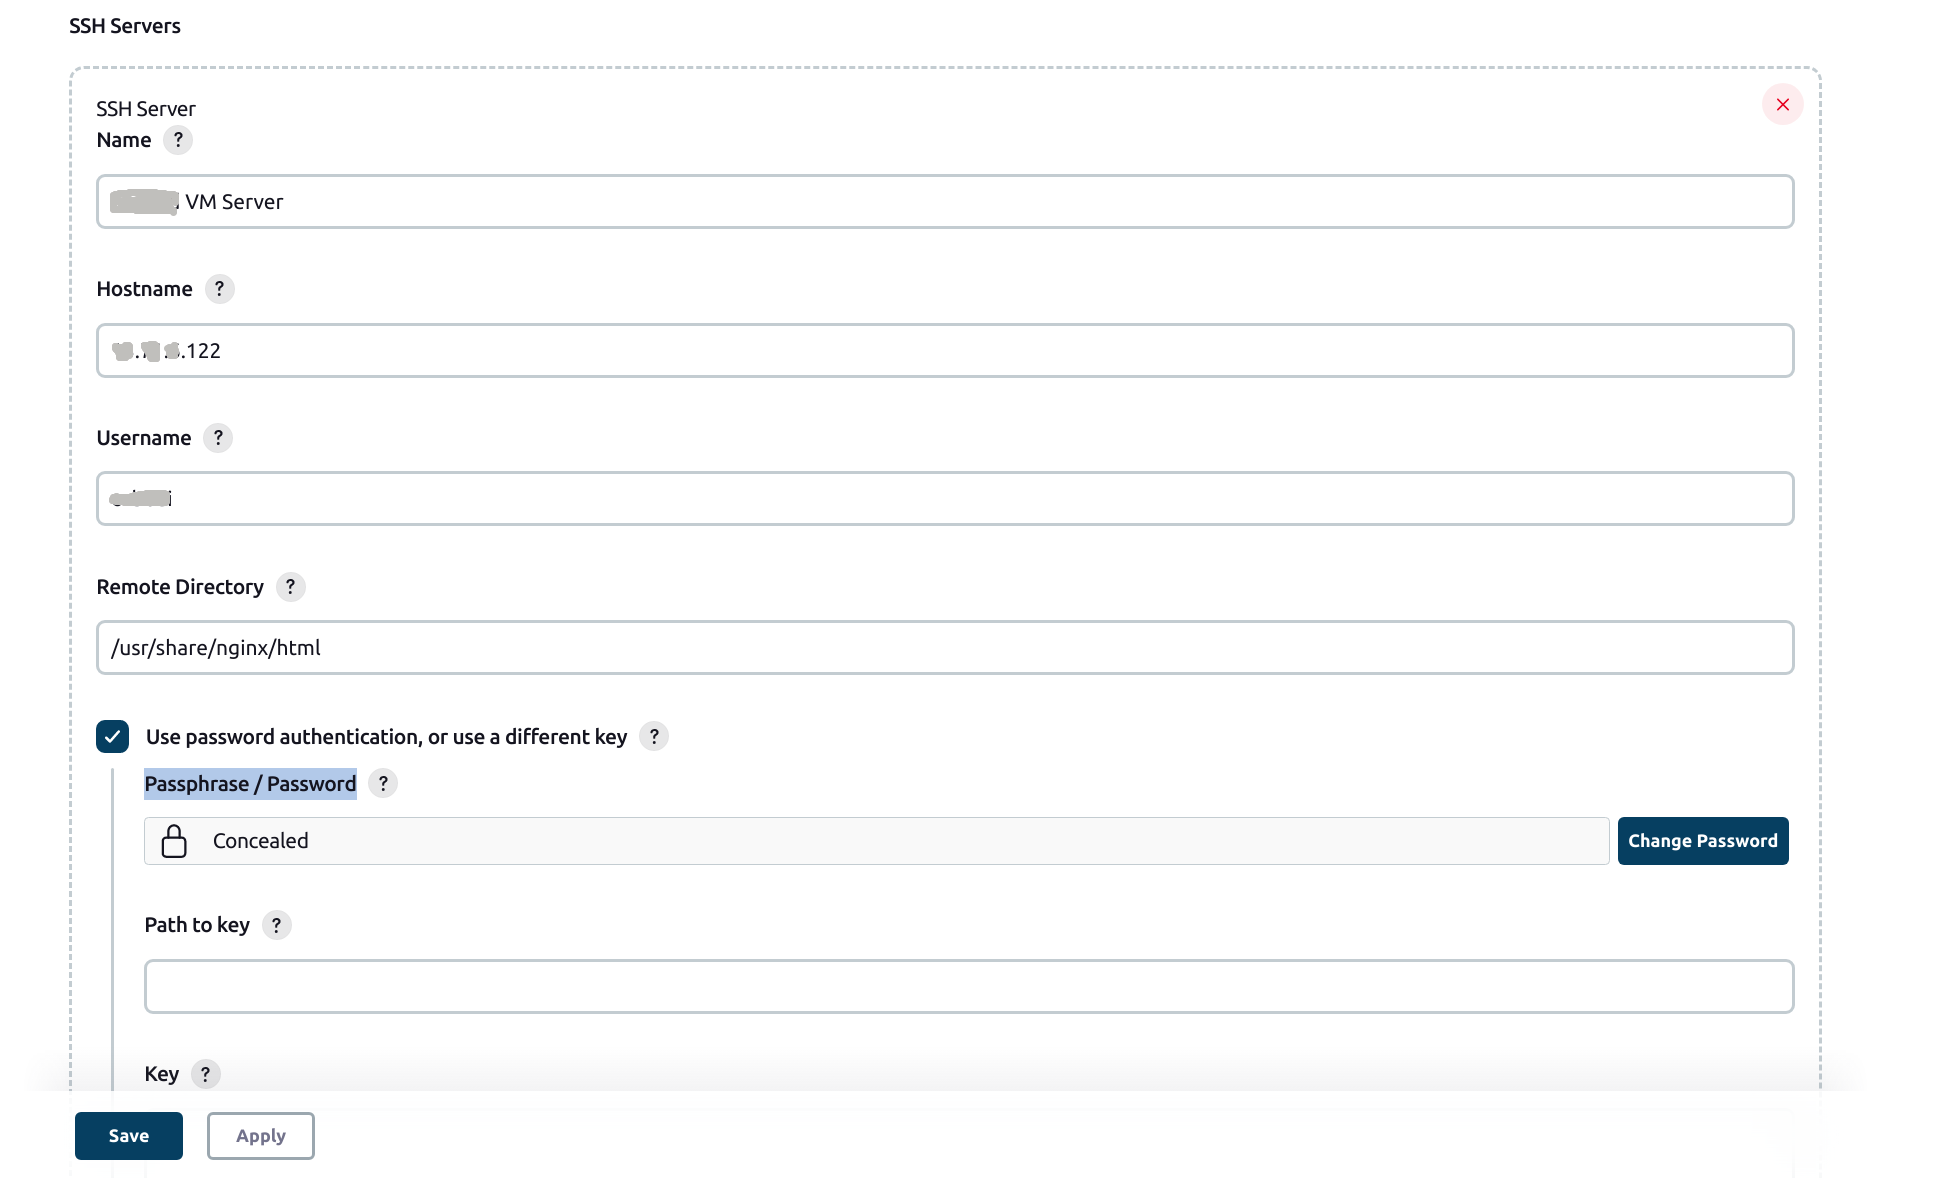
Now we will add our remote server, for that navigate to Dashboard > Manage Jenkins > Configure System and locate SSH Servers section then click on Add button*.*
Enter the server name, hostname (IP address) and user name in the form. Open the advanced options section by clicking the Advanced button. Check the checkbox of Use password authentication, or use a different key option. Enter the server password in the input box of the Passphrase / Password field. Save these changes by clicking the save button.
Now move back to CI CD pipeline and go to Post-build Actions section. Click on Add post-build action and select Send build artifacts over SSH.
In opened section select the server earlier we added. In transfers enter the following information in respective fields
Source files: build/**/*
Remove prefix: /build/
Remote directory: /test_react_app_cicd/ (Directory, where build, should be copied)
Exec command: Print some message with echo command to confirm the success of this operation.

Finally, our CI CD pipeline is ready click on the save button to save the changes.
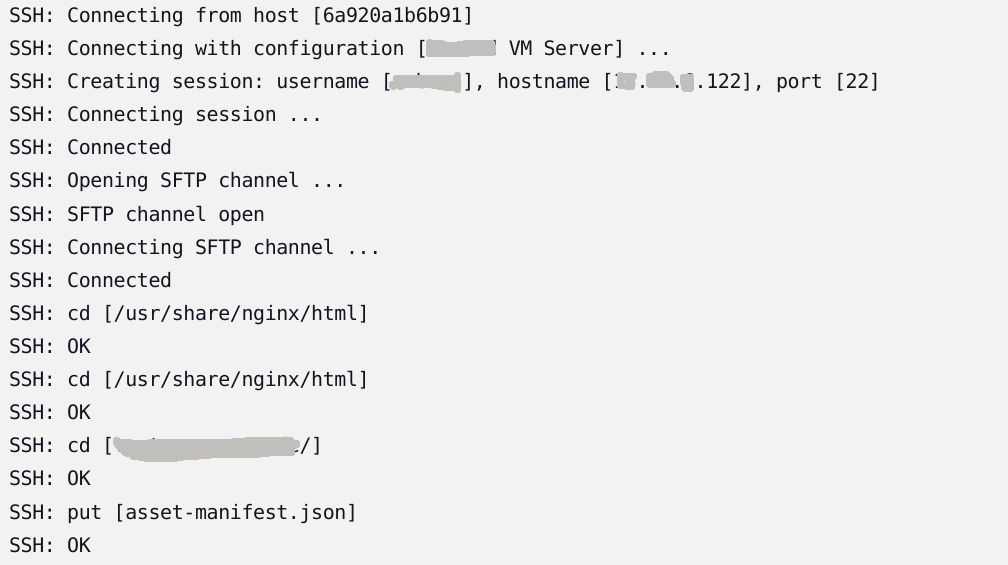
To test this pipeline commit the code in Gitlab on a specific branch which is been configured for CICD. To know the working of the pipeline navigate to ci cd project just we created from the dashboard. Check the build history from Build History section which is at the left bottom. You will see the build number with # with the running label. Hover on that build number you will see a down arrow, click on it to see options under that arrow. Locate the Console Output and click on that option. It will show the output of each step we configured earlier. At this point, everything should work and at the end of the output you should see Finished: SUCCESS message.
Following are the some results of the pipeline steps you will see in the console output


Conclusion
We have successfully created and executed CI CD pipeline in Jenkins to automate the deployment of React App from Gitlab to a remote server.