Create an Azure Linux Virtual Machine with Terraform

Introduction
In this blog, I'll tell you how to create an Azure Linux Virtual Machine using Terraform.
Prerequisite
Azure subscription
Terraform installed
Azure CLI installed
Azure Subscription?
An Azure subscription is mandatory when you are using Azure resources like a database, virtual network, storage account or virtual machine.
Terraform
Terraform is an open-source infrastructure as code software tool that enables you to safely and predictably create, change, and improve infrastructure.
We will use this tool to create a simple Linux virtual machine to help you get started on your terraform learning journey.
Create Terraform Configuration Files
- Create a separate directory for terraform files
cd ~

mkdir terraform-example

cd terraform-example
- Let’s create our terraform file and name it main.tf
touch main.tf
- Create the AzureRM Provider in Terraform
Open up main.tf in your editor of choice and add the Azure provider to the top of the file.
provider "azurerm" {
  features {}
}
- Define the Azure Resource Group
Now let’s create our new resource group that everything will live inside. Select a region of your choice
resource "azurerm_resource_group" "main" {
  name     = "tfvmexample-rg"
  location = "Central India"
}
- Define a Virtual Network
Virtual Network enables Virtual Machine to securely communicate with the internet and on-premises networks.
# Create virtual network
resource "azurerm_virtual_network" "main" {
  name                = "tfvmexample-vnet"
  address_space       = ["10.0.0.0/16"]
  location            = azurerm_resource_group.main.location
  resource_group_name = azurerm_resource_group.main.name
}
- Define Subnet
Subnets enable you to segment the Virtual Network into one or more sub-networks and allocate a portion of the virtual network's address space to each subnet. You can then deploy Azure Virtual Machine in a specific subnet.
# Create subnet
resource "azurerm_subnet" "internal" {
  name                 = "tfvmexample-subnet"
  resource_group_name  = azurerm_resource_group.main.name
  virtual_network_name = azurerm_virtual_network.main.name
  address_prefixes     = ["10.0.1.0/24"]
}
- Define Public IP Address
Public IP addresses enables Virtual Machine to communicate to Internet
# Create public IP
resource "azurerm_public_ip" "main" {
  name                = "tfvmexample-public-ip"
  location            = azurerm_resource_group.main.location
  resource_group_name = azurerm_resource_group.main.name
  allocation_method   = "Static"
}
- Define Network Security Group and Rules
A network security group contains security rules that allow or deny inbound network traffic to, or outbound network traffic from Virtual Machine. Here 3 inbound rules have been defined for SSH, HTTP and TCP connections to be allowed with Virtual Machine.
# Create Network Security Group and rule
resource "azurerm_network_security_group" "main" {
  name                = "tfvmexample-network-security-group"
  location            = azurerm_resource_group.main.location
  resource_group_name = azurerm_resource_group.main.name

  security_rule {
    name                       = "SSH"
    priority                   = 300
    direction                  = "Inbound"
    access                     = "Allow"
    protocol                   = "Tcp"
    source_port_range          = "*"
    destination_port_range     = "22"
    source_address_prefix      = "*"
    destination_address_prefix = "*"
  }

  security_rule {
    name                       = "HTTP"
    priority                   = 310
    direction                  = "Inbound"
    access                     = "Allow"
    protocol                   = "Tcp"
    source_port_range          = "*"
    destination_port_range     = "80"
    source_address_prefix      = "*"
    destination_address_prefix = "*"
  }

  security_rule {
    name                       = "CutomPort9000"
    priority                   = 320
    direction                  = "Inbound"
    access                     = "Allow"
    protocol                   = "Tcp"
    source_port_range          = "*"
    destination_port_range     = "9000"
    source_address_prefix      = "*"
    destination_address_prefix = "*"
  }
}
- Define Network Interface for our VM
A virtual machine created with the Azure portal, has one network interface with default settings. You may change default settings also. Here Public address defined earlier is attached to Network Interface
# Create network interface
resource "azurerm_network_interface" "main" {
  name                = "tfvmexample-nic"
  resource_group_name = azurerm_resource_group.main.name
  location            = azurerm_resource_group.main.location

  ip_configuration {
    name                          = "tfvmexample-nic-config"
    subnet_id                     = azurerm_subnet.internal.id
    private_ip_address_allocation = "Dynamic"
    public_ip_address_id          = azurerm_public_ip.main.id
  }
}
- Connect the Security Group to the Network Interface
Associate Security Group defined earlier to Network Interface
# Connect the security group to the network interface
resource "azurerm_network_interface_security_group_association" "main" {
  network_interface_id      = azurerm_network_interface.main.id
  network_security_group_id = azurerm_network_security_group.main.id
}
- Define the Virtual Machine
Define Virtual Machine with parameters like name, admin username and password, size to handle the workload, OS image reference and disk.
Attach Network Interface Id defined earlier to Virtual Machine
# Create virtual machine
resource "azurerm_linux_virtual_machine" "main" {
  name                            = "tfvmexample-vm"
  resource_group_name             = azurerm_resource_group.main.name
  location                        = azurerm_resource_group.main.location
  size                            = "Standard_D8s_v3"
  admin_username                  = "adminuser"
  admin_password                  = "Terraform@123"
  disable_password_authentication = false
  network_interface_ids = [
    azurerm_network_interface.main.id,
  ]

  source_image_reference {
    publisher = "Canonical"
    offer     = "UbuntuServer"
    sku       = "18_04-lts-gen2"
    version   = "latest"
  }

  os_disk {
    storage_account_type = "Premium_LRS"
    caching              = "ReadWrite"
  }

}
The final main.tf file is as below
provider "azurerm" {
  features {}
}

resource "azurerm_resource_group" "main" {
  name     = "tfvmexample-rg"
  location = "Central India"
}

# Create virtual network
resource "azurerm_virtual_network" "main" {
  name                = "tfvmexample-vnet"
  address_space       = ["10.0.0.0/16"]
  location            = azurerm_resource_group.main.location
  resource_group_name = azurerm_resource_group.main.name
}

# Create subnet
resource "azurerm_subnet" "internal" {
  name                 = "tfvmexample-subnet"
  resource_group_name  = azurerm_resource_group.main.name
  virtual_network_name = azurerm_virtual_network.main.name
  address_prefixes     = ["10.0.1.0/24"]
}

# Create public IP
resource "azurerm_public_ip" "main" {
  name                = "tfvmexample-public-ip"
  location            = azurerm_resource_group.main.location
  resource_group_name = azurerm_resource_group.main.name
  allocation_method   = "Static"
}

# Create Network Security Group and rule
resource "azurerm_network_security_group" "main" {
  name                = "tfvmexample-network-security-group"
  location            = azurerm_resource_group.main.location
  resource_group_name = azurerm_resource_group.main.name

  security_rule {
    name                       = "SSH"
    priority                   = 300
    direction                  = "Inbound"
    access                     = "Allow"
    protocol                   = "Tcp"
    source_port_range          = "*"
    destination_port_range     = "22"
    source_address_prefix      = "*"
    destination_address_prefix = "*"
  }

  security_rule {
    name                       = "HTTP"
    priority                   = 310
    direction                  = "Inbound"
    access                     = "Allow"
    protocol                   = "Tcp"
    source_port_range          = "*"
    destination_port_range     = "80"
    source_address_prefix      = "*"
    destination_address_prefix = "*"
  }

  security_rule {
    name                       = "CutomPort9000"
    priority                   = 320
    direction                  = "Inbound"
    access                     = "Allow"
    protocol                   = "Tcp"
    source_port_range          = "*"
    destination_port_range     = "9000"
    source_address_prefix      = "*"
    destination_address_prefix = "*"
  }
}

# Create network interface
resource "azurerm_network_interface" "main" {
  name                = "tfvmexample-nic"
  resource_group_name = azurerm_resource_group.main.name
  location            = azurerm_resource_group.main.location

  ip_configuration {
    name                          = "tfvmexample-nic-config"
    subnet_id                     = azurerm_subnet.internal.id
    private_ip_address_allocation = "Dynamic"
    public_ip_address_id          = azurerm_public_ip.main.id
  }
}

# Connect the security group to the network interface
resource "azurerm_network_interface_security_group_association" "main" {
  network_interface_id      = azurerm_network_interface.main.id
  network_security_group_id = azurerm_network_security_group.main.id
}

# Create virtual machine
resource "azurerm_linux_virtual_machine" "main" {
  name                            = "tfvmexample-vm"
  resource_group_name             = azurerm_resource_group.main.name
  location                        = azurerm_resource_group.main.location
  size                            = "Standard_D8s_v3"
  admin_username                  = "adminuser"
  admin_password                  = "Terraform@123"
  disable_password_authentication = false
  network_interface_ids = [
    azurerm_network_interface.main.id,
  ]

  source_image_reference {
    publisher = "Canonical"
    offer     = "UbuntuServer"
    sku       = "18_04-lts-gen2"
    version   = "latest"
  }

  os_disk {
    storage_account_type = "Premium_LRS"
    caching              = "ReadWrite"
  }

}
Login to Azure with CLI
Make sure you have the Azure CLI installed, then run:
az login
Which should bring up a browser window for you to log in to your Azure subscription.
Apply Terraform Configuration
Now that we have written our config file, let’s run these 👇🏼 commands to let Terraform do its job.
terraform init
This will download and install the AZURE plugins for the providers we used. It initializes the backend as well.

Run the below command to see the changes that will take place on the infrastructure.
terraform plan

As we can see above plan suggests 8 resources to be added to the infrastructure.
If everything looks alright, let’s apply the changes by running 👇🏼
terraform apply
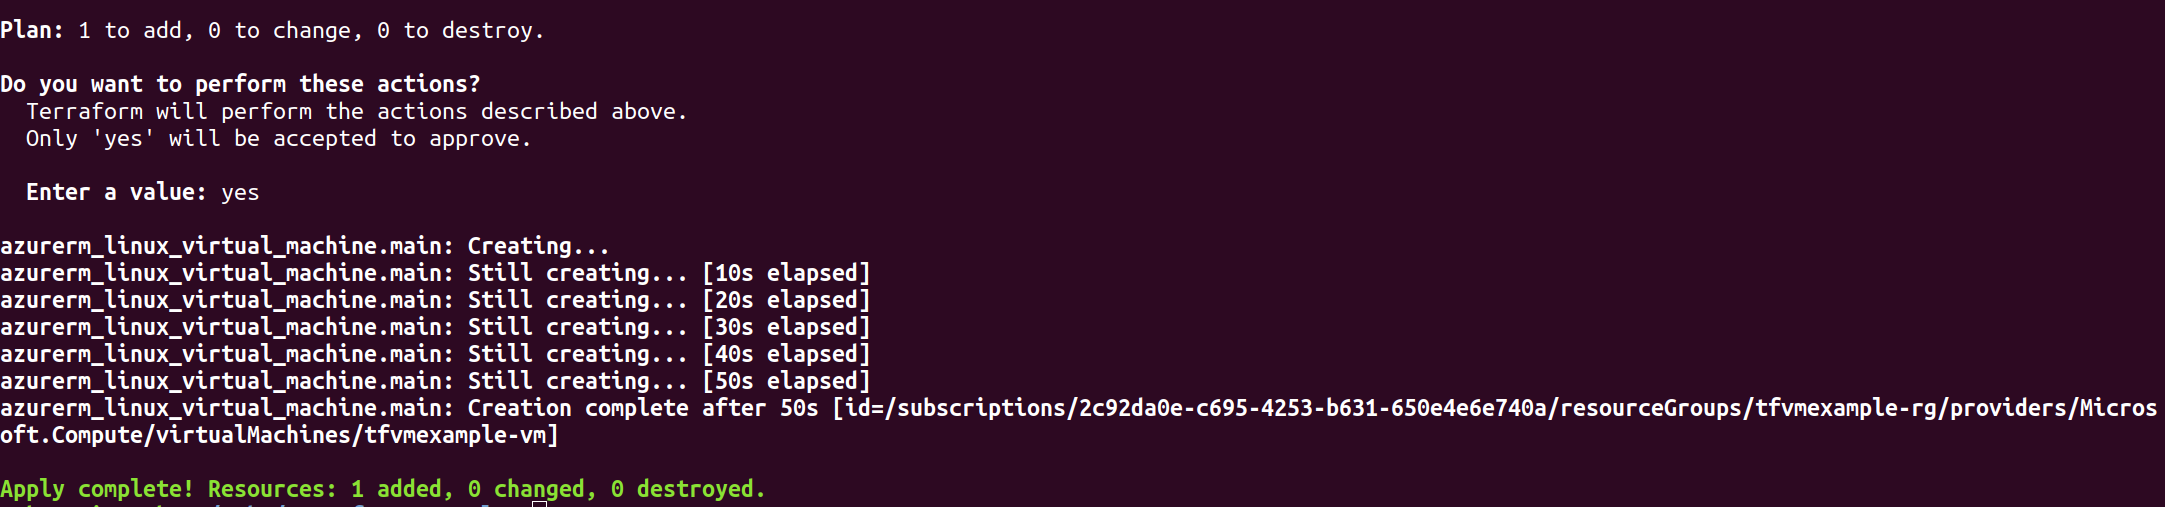
As we can see above 1 Virtual Machine addition is completed.
Finally, you should be able to see the Azure Virtual Machine up and running in Azure Portal.

Destroy the virtual machine because it will cost you a lot if we keep it running for a longer time.
terraform destroy
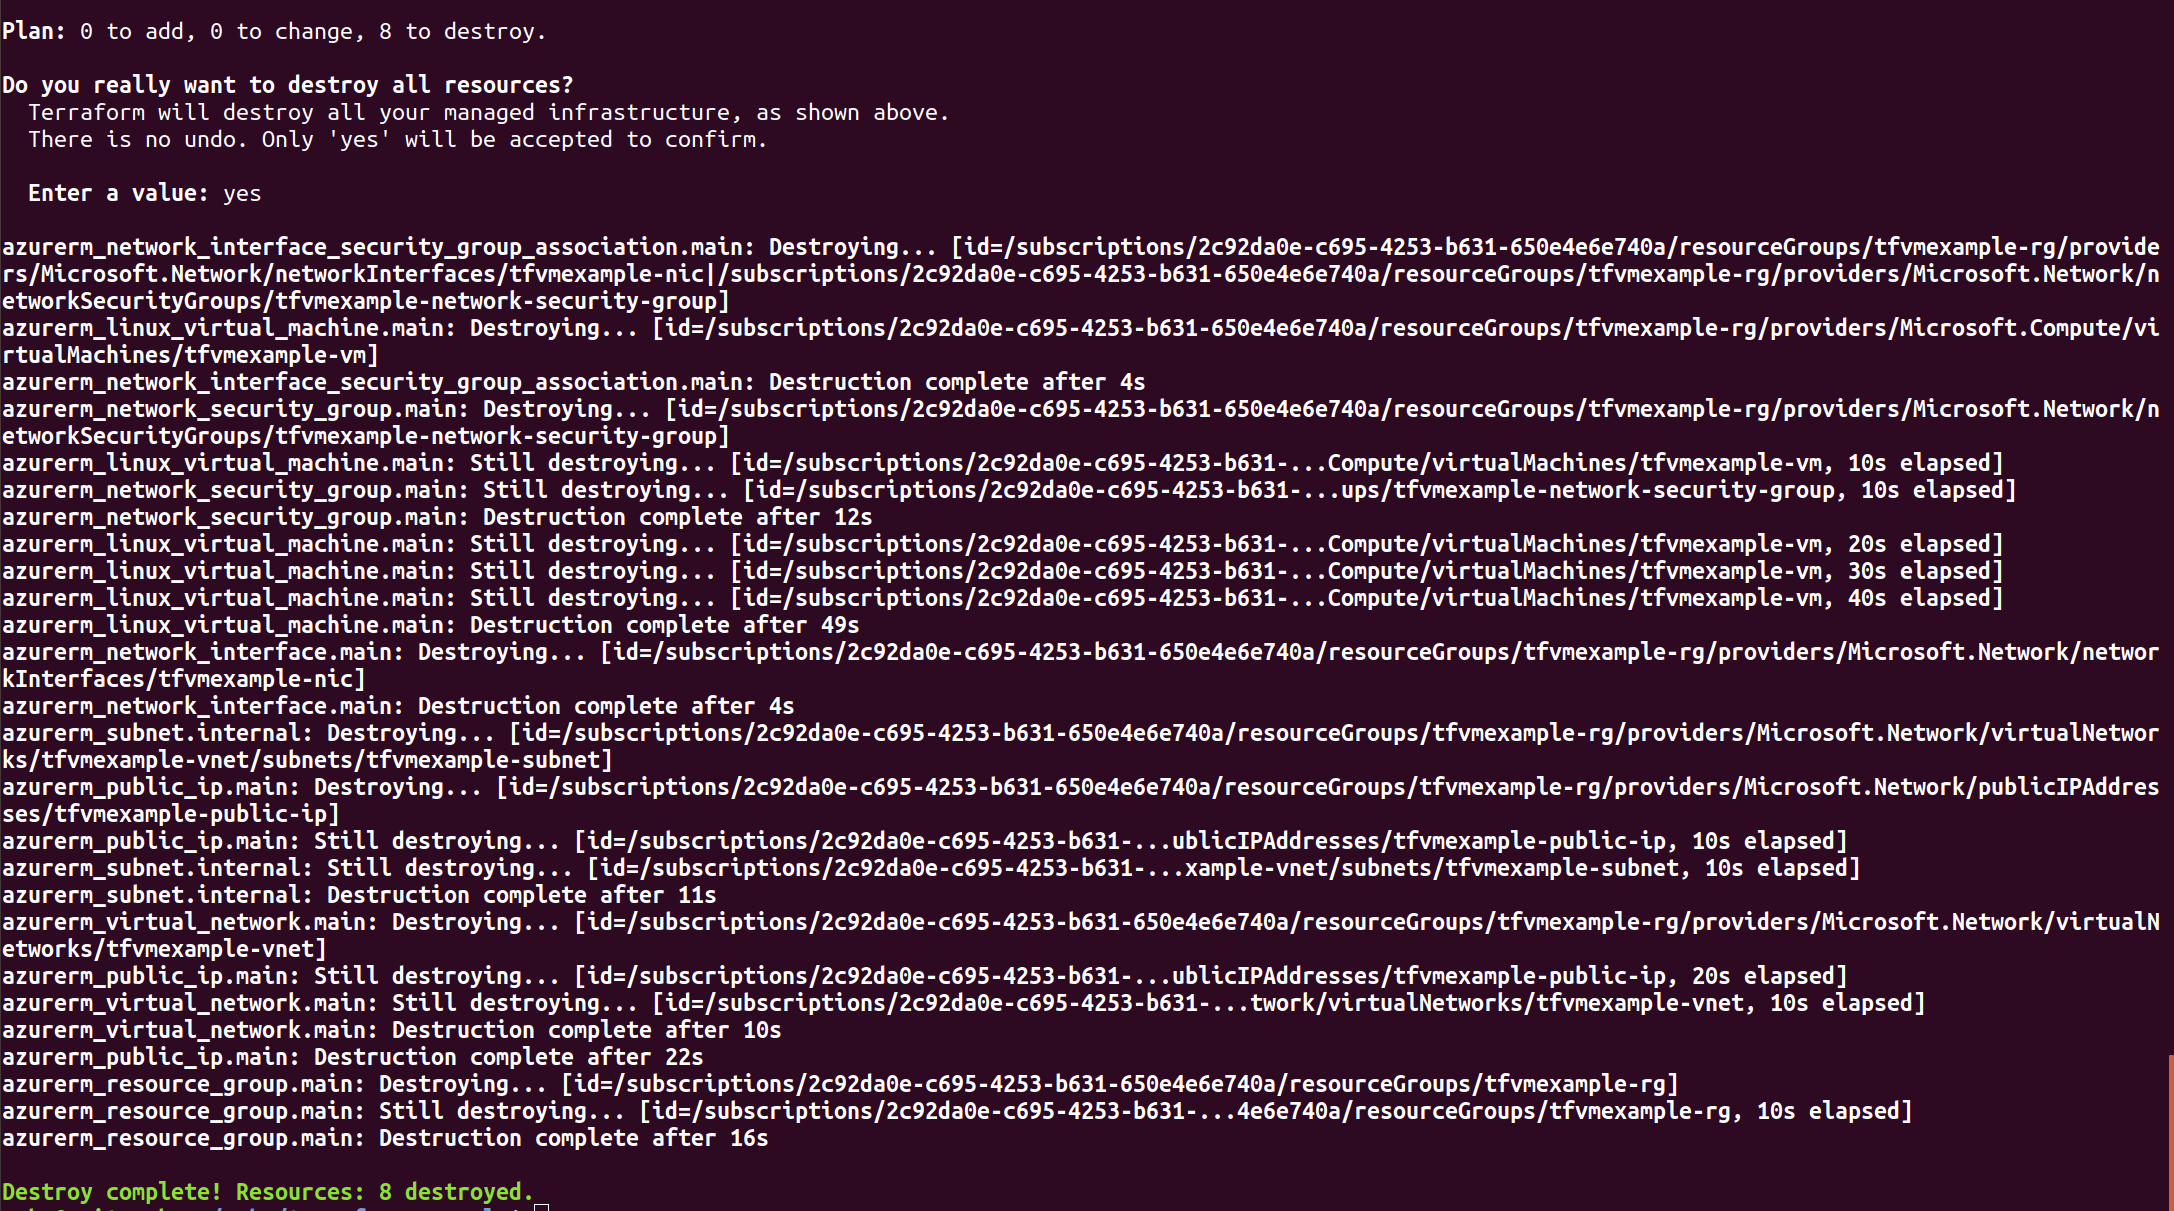
As we can see above 8 resources were destroyed which were created along with Virtual Machine.
Conclusion
Terraform makes it easy for administrators to provision cloud resources in Azure. Using Terraform’s command files, you can automate provisioning to reduce the overhead of manually creating resources in the Azure portal.
About the author
I am a software engineer. Documenting my DevOps journey
Comments
Join the discussionNo comments yet. Be the first to comment.